之前提到想整個網站,將自己啲嘢整理好,但一直都冇頭緒點樣可以有條理咁去做。隔咗個幾星期想 pick up 返,但唔記得晒啲 steps 同 files 邊個打邊個。另外放咗喺 GitLab Pages 之後發現好多 link 都唔啱,今次想記錄下,等自己之後就算隔咗好耐再整,都可以有嘢跟下,唔使左搵右搵。
Idea
- 文章可以透過 Git 喺各個 device 同埋 GitLab 上面同步
- Joplin 入面嘅文章亦會同步,作為 draft 或者係 published copy 咁用
- 需要加嘢或改嘢就會經由 Joplin 修改,再 export 去行 Git 嘅 folder 度,同步到 GitLab 上面
Hugo Extended
會用 Hugo 係因為貪佢有現剩 Windows binary,隨身帶住真係去到邊用到邊,就算冇帶住,只要上返 GitHub download 再 extract 就可以即刻用,非常方便。
第一步,睇下 Hugo 點用先 - 上次試嗰陣發現 ren 唔到識得郁嘅 webp,所以我依家用嘅係 Hugo extended
Bello> .\hugo.exe version
hugo v0.95.0-9F2E76AF+extended windows/amd64 BuildDate=2022-03-16T14:20:19Z VendorInfo=gohugoio
然後就跟住佢個 quick start 做一次,開個 new site 先
Bello> .\hugo.exe new site laboda
Congratulations! Your new Hugo site is created in [current-path]\laboda.

Just a few more steps and you're ready to go:

1. Download a theme into the same-named folder.
   Choose a theme from https://themes.gohugo.io/ or
   create your own with the "hugo new theme <THEMENAME>" command.
2. Perhaps you want to add some content. You can add single files
   with "hugo new <SECTIONNAME>\<FILENAME>.<FORMAT>".
3. Start the built-in live server via "hugo server".

Visit https://gohugo.io/ for quickstart guide and full documentation.
Bello> cd laboda
Bello> ls
Mode                 LastWriteTime         Length Name
----                 -------------         ------ ----
d----            3/4/2022 10:01 am                archetypes
d----            3/4/2022 10:01 am                content
d----            3/4/2022 10:01 am                data
d----            3/4/2022 10:01 am                layouts
d----            3/4/2022 10:01 am                static
d----            3/4/2022 10:01 am                themes
-a---            3/4/2022 10:01 am             82 config.toml
之後就揀個 theme 加落去,我唔係太滿意上次試嗰陣個 theme 喺電話上面睇嘅效果,我覺得啲字有啲太大,但其實個個 theme 都係咁上下,好似依家係興咁樣 🙃 今次揀咗 Paper
git init
git submodule add https://github.com/nanxiaobei/hugo-paper themes/paper
"theme = 'paper'" | Out-File -Append .\config.toml
然後加一個新 page 落去,可以手揼,亦都可以用 hugo new 起個頭先
..\hugo.exe new bananas/bello-world-again.md
會有最基本嘅 front matter information,default 係 draft=true,啫係呢篇仲係 draft,未 publish
Bello> gc .\content\bananas\bello-world-again.md
---
title: "Bello World Again"
date: 2022-04-03T10:40:45+08:00
draft: true
---
寫啲嘢,再 run hugo server 睇睇,加 -D option 可以 enable draft,唔加會睇唔到 draft=true 嘅嘢
"Bello world!" | Out-File -Append .\content\bananas\bello-world-again.md
..\hugo.exe server -D
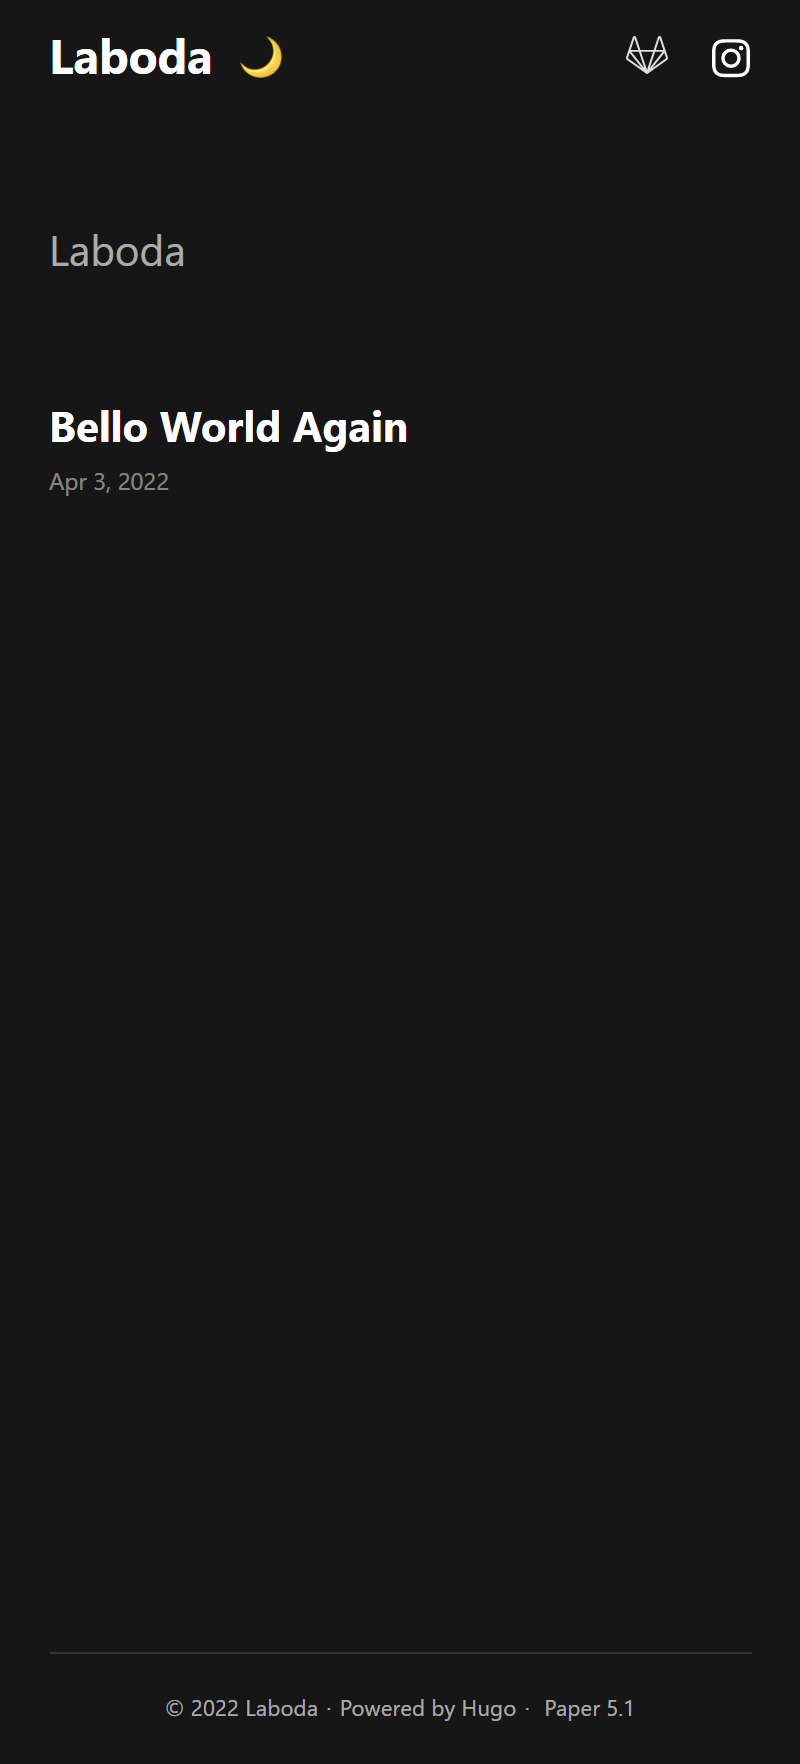
Hugo Theme
Paper
值得留意嘅係,每個 theme 都可能會有唔同嘅 settings,例如有啲 support 加 tags,有啲 support 轉 mode - 要換一個 theme 唔能夠剩係望住 Hugo official site,而係要望返個 theme 嘅 documentation,睇下佢有冇整自己嘅 shortcodes
呢個 theme 冇詳細 documentation,剩係留咗個 example 畀大家參考。
我見佢整咗啲 social icons 可以用,於是睇下佢哋擺咗喺邊:
themes\paper\layouts\_default\baseof.html
{{ $.Scratch.Delete "social-list" }}<!---->
{{ $social := slice "twitter" "github" "instagram" }}<!---->
{{ range $social }}<!---->
{{ if isset site.Params . }}<!---->
{{ $.Scratch.Add "social-list" (slice .) }}<!---->
{{ end }}<!---->
{{ end }}<!---->
themes\paper\layouts\partials\header.html
  {{ with $.Scratch.Get "social-list" }}
  <nav class="social">
    {{ range . }}
    <a
      class="{{ . }}"
      style="--url: url(./{{ . }}.svg)"
      href="https://{{ . }}.com/{{ site.Params.Get . }}"
      target="_blank"
    ></a>
    {{ end }}
  </nav>
  {{ end }}
似乎就係擺定啲 svg 喺度 call,搵到之後試下 static folder 加隻 gitlab.svg 落去
{{ $.Scratch.Delete "social-list" }}<!---->
{{ $social := slice "twitter" "gitlab" "github" "instagram" }}<!---->
{{ range $social }}<!---->
{{ if isset site.Params . }}<!---->
{{ $.Scratch.Add "social-list" (slice .) }}<!---->
{{ end }}<!---->
{{ end }}<!---->
成功,但佢係求其 {key}.com/{value} 就算數,啫係一有唔係 .com 嗰啲就唔可以咁樣改 🙃
一係就咁樣改
  {{ with $.Scratch.Get "social-list" }}
  <nav class="social">
    {{ range . }}
    <a
      class="{{ . }}"
      style="--url: url(./{{ . }}.svg)"
      href="{{ site.Params.Get . }}"
      target="_blank"
    ></a>
    {{ end }}
  </nav>
  {{ end }}
[params]
gitlab = 'https://gitlab.com/belloah'
instagram = 'https://instagram.com/mescreamson'
powershellgallery = 'https://www.powershellgallery.com/profiles/belloah'
改完就擺咩 link 都得嘞。
PaperMod
但睇多幾睇就發現,我一開始試嗰個 PaperMod 啲功能真係完善好多 🙃 唔使自己郁手改咁多嘢,所以我決定都係用返佢,裝返個 theme 先
git clone https://github.com/adityatelange/hugo-PaperMod themes/PaperMod --depth=1
跟住 document 改 config,用盡個 theme 嘅功能
theme = 'PaperMod'
[params]
ShowCodeCopyButtons = true
ShowBreadCrumbs = true
ShowShareButtons = true
ShowPostNavLinks = true
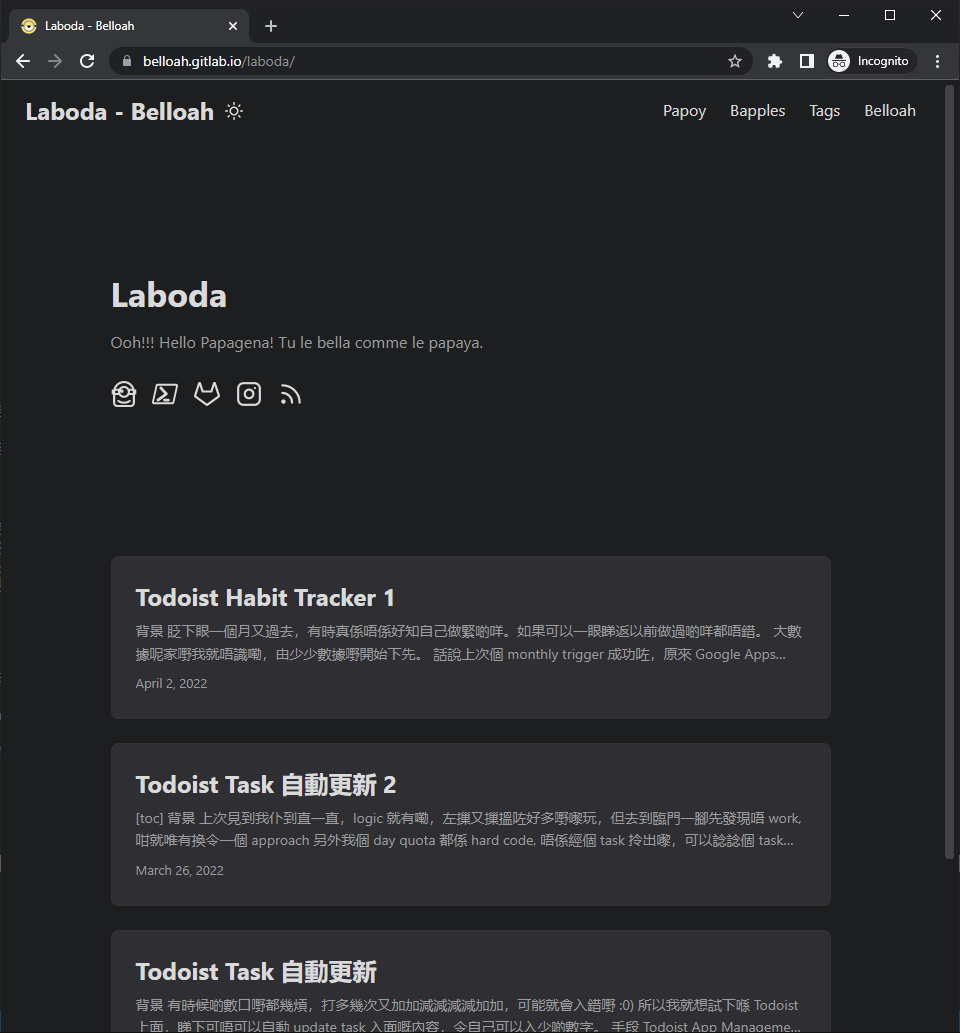
[params.homeInfoParams]
Content = "Ooh!!! Hello Papagena! Tu le bella comme le papaya."
Title = "Laboda"
[params.homeInfoParams]
Title = "Laboda"
Content = "Ooh!!! Hello Papagena! Tu le bella comme le papaya."
[[params.socialIcons]]
name = "gitlab"
url = "https://gitlab.com/belloah"
[[params.socialIcons]]
name = "instagram"
url = "https://instagram.com/mescreamson"
[[params.socialIcons]]
name = "rss"
url = "/index.xml"
照樣搵下啲 icon 點改,呢個 theme 就直接將佢放喺 html
{{- else if (eq $icon_name "instagram") -}}
<svg xmlns="http://www.w3.org/2000/svg" viewBox="0 0 24 24" fill="none" stroke="currentColor" stroke-width="2"
    stroke-linecap="round" stroke-linejoin="round">
    <rect x="2" y="2" width="20" height="20" rx="5" ry="5"></rect>
    <path d="M16 11.37A4 4 0 1 1 12.63 8 4 4 0 0 1 16 11.37z"></path>
    <line x1="17.5" y1="6.5" x2="17.5" y2="6.5"></line>
</svg>
咁我就喺下面加返兩個,抄返上面加 fill="currentColor" 去跟返 theme 改顏色
{{- else if (eq $icon_name "home") -}}
<svg xmlns="http://www.w3.org/2000/svg" fill="currentColor" x="0px" y="0px" viewBox="5.999845504760742 5 35.00031280517578 37"><path d={data here}></path></svg>
{{- else if (eq $icon_name "powershell") -}}
<svg xmlns="http://www.w3.org/2000/svg" fill="currentColor" x="0px" y="0px" viewBox="2.0019209384918213 5 27.99556541442871 22"><path d={data here}></path></svg>
之後就可以咁樣用
[[params.socialIcons]]
name = "home"
url = "https://belloah.gitlab.io"
[[params.socialIcons]]
name = "powershell"
url = "https://www.powershellgallery.com/profiles/belloah"
Configurations
Relative Path
接住落嚟就係我上次試嘅時候覺得好困惑嘅嘢,因為我唔係就咁 deploy 落 gitlab.io domain,而係再落一層,所以要將所有relative path 轉成 absolute path 先可以正常用到 relative path,喺 config 度加返
canonifyurls = true
當一條 link href 係 /index.xml,而 baseURL = 'https://belloah.gitlab.io/laboda/':
canonifyurls = true,render 之後係https://belloah.gitlab.io/laboda/index.xmlcanonifyurls = false,render 之後係https://belloah.gitlab.io/index.xml
但事情並唔係咁簡單,當一個 menu item link href 係 /index.xml,而 baseURL = 'https://belloah.gitlab.io/laboda/':
canonifyurls = true,render 之後係 https://belloah.gitlab.io/index.xmlcanonifyurls = false,render 之後係 https://belloah.gitlab.io/laboda/index.xml
是咪好混亂呢?另外仲有個叫 relativeurls,係用嚟將所有 relative path refer to baseURL,呢個就唔會搞到 menu 啲 link,但就會搞到 CSS
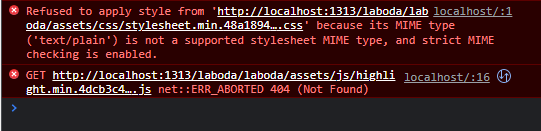
嘗試咗 build 一次,的確 CSS 嗰度係會 gen 成咁
<link crossorigin="anonymous" href="/laboda/assets/css/stylesheet.min.48a18943c2fc15c38a372b8dde1f5e5dc0bc64fa6cb90f5a817d2f8c76b7f3ae.css" integrity="sha256-SKGJQ8L8FcOKNyuN3h9eXcC8ZPpsuQ9agX0vjHa3864=" rel="preload stylesheet" as="style">
最後我冇理到 relativeurls,照用 canonifyurls = true,再喺 themes\PaperMod\layouts\partials\header.html 度,將其中一個 absLangURL 改成 relLangURL (a href 入面),似乎行得通。
<ul id="menu">
 {{- range site.Menus.main }}
 {{- $menu_item_url := (cond (strings.HasSuffix .URL "/") .URL (printf "%s/" .URL) ) | absLangURL }}
 {{- $page_url:= $currentPage.Permalink | absLangURL }}
 {{- $is_search := eq (site.GetPage .KeyName).Layout `search` }}
 <li>
  <a href="{{ .URL | relLangURL }}" title="{{ .Title | default .Name }} {{- cond $is_search (" (Alt + /)" | safeHTMLAttr) ("" | safeHTMLAttr ) }}"
  {{- cond $is_search (" accesskey=/" | safeHTMLAttr) ("" | safeHTMLAttr ) }}>
   <span {{- if eq $menu_item_url $page_url }} class="active" {{- end }}>
    {{- .Pre }}
    {{- .Name -}}
    {{ .Post -}}
   </span>
  </a>
 </li>
 {{- end }}
</ul>
喺 themes\PaperMod\layouts\_default\list.html 亦都一樣,將 absURL 改成 relURL
  <nav class="pagination">
    {{- if $paginator.HasPrev }}
    <a class="prev" href="{{ $paginator.Prev.URL | relURL }}">« {{ i18n "prev_page" }}</a>
    {{- end }}
    {{- if $paginator.HasNext }}
    <a class="next" href="{{ $paginator.Next.URL | relURL }}">{{ i18n "next_page" }} »</a>
    {{- end }}
  </nav>
Pages
之後就起返各種 page 出嚟,基本上都係用 front matter 堆砌出嚟,之後嘅事個 theme 會處理。首先整個 archive.md
---
title: "Bapples"
layout: "archives"
url: "/bapples/"
summary: archives
---
之後就係 search.md,要加個 config
[outputs]
home = ["HTML", "RSS", "JSON"]
---
title: "Papoy" # in any language you want
layout: "search" # is necessary
# url: "/archive"
description: "Ah! Papoy!"
summary: "search"
placeholder: "Yah Palatu... Papoy..."
---
最後就改返 config 入面 menu 啲 URL,見到啲 level 唔同咗,係因為我說時遲那時快,將啲 config 分晒 group,呢個就搬咗出嚟 menu.toml,方便之後改嘢,同埋得閒中意用下 JSON 又得,用下 yaml 又得。
[[main]]
identifier = "search"
name = "Papoy"
url = "/papoy/"
weight = 10
[[main]]
identifier = "archives"
name = "Bapples"
url = "/bapples/"
weight = 20
Posts from Joplin to Hugo
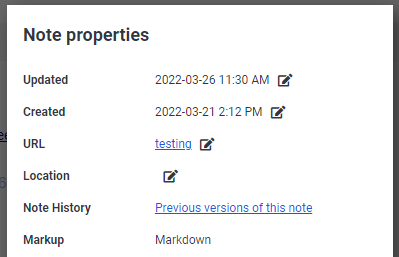
搞好晒啲門面嘢,終於要搞返啲實際啲嘅嘢。正如頭先所試,用 hugo new 整出嚟嘅 md 有 title、date、draft 三樣嘢。而我上次用 Joplin export 出嚟嘅文試嘅時候,見到 Joplin 同樣可以 export 有 front matter 嘅文,內容如下
---
title: Testing
updated: 2022-03-26 03:30:00Z
created: 2022-03-21 06:12:00Z
source: testing
tags:
- testing
---
This is a testing note with pictures


我試過直接將 created 轉做 date 係可行嘅,而 source 就係 Joplin 入面嘅 url field
然後 directory structure 就係咁,其中 Laboda 係 md 所在 notebook 嘅名,_resources 就係用嚟放文字以外嘅嘢,如果 export 多過一次的話會喺 md 後面加 -n,唔會 overwrite 舊 version
{folder chosen to export}
├───Laboda
└───_resources
做法就係搬啲 resources 去 site 嘅 static folder,咁佢哋就會變成 {BaseURL}/_resources/*
Move-Item .\_resources\ -Destination ..\hugo_extended_0.95.0_Windows-64bit\laboda\static\
然後 md 就去 content 下面嘅 bananas
Move-Item .\Laboda\* -Destination ..\hugo_extended_0.95.0_Windows-64bit\laboda\content\bananas\
乜都唔改就咁搬,結果就會係咁,而 URL 就會係 md file 名中間加 “-"。
Why Joplin
睇到呢度嘅人可能會開始疑惑,點解非 Joplin 不可?自己手揼唔好咩?
前面我都提過,我真係好欣賞 Joplin 呢個 project,佢真係越做越好,入面有幾樣嘢我都覺得好方便同埋好常用,例如係落 tag、search notes、邊打邊睇效果等等。或者應該咁講,其實我只係想將我平時喺 Joplin 寫低嘅嘢,獨樂樂不如聚樂樂,開心 share 下。
所以呢,Joplin 唔 Joplin 其實唔是一個問題 - Joplin 係我嘅兄弟,Hugo 係我兄弟嘅 buddy。
Joplin Data API
其實我之前整 Joplin 嘅 CSS 嘅時候,有見過 Joplin 嘅一啲 command line options,不過最近搵又發現好似冇乜記載,反而有一堆 API 嘅 documentation,仲畀我搵到篇咁嘅嘢
For the desktop app, none of the parameters are officially supported, so they are not documented either. –profile for example is used internally by the portable app or for development, but it’s not meant for users as improper use can lead to data loss.
–laurent (founder of Joplin)
既然係咁,就試下啲有得跟嘅嘢先啦。首先要確保 Options > Web Clipper 嘅 step 1 係 enabled,同埋有 advanced options 嘅 token 喺手
之後就試下拎 notes
Invoke-RestMethod http://localhost:41184/notes?token=$token
得到以下嘅嘢
JSON
└───items
    ├───id
    ├───parent_id
    └───title
拎特定一個 note
Invoke-RestMethod http://localhost:41184/notes/$($id)?token=$token
加埋我想要嘅 fields
Invoke-RestMethod "http://localhost:41184/notes/$($id)?token=$token&fields=title,created_time,source_url,body"
Invoke-RestMethod "http://localhost:41184/notes/$($id)/tags?token=$token"
Invoke-RestMethod "http://localhost:41184/notes/$($id)/resources?token=$token&fields=id,title,file_extension"
Joplin API 同樣有 pagination 嘅概念,想完整拎晒所有 data,就要確保 has_more=false,resources 亦係同樣道理
$alltags = @(); $i=1;
do { $tags = Invoke-RestMethod "http://localhost:41184/notes/$($id)/tags?token=$token&fields=title&page=$i"; $alltags += $tags.items; $continue = $tags.has_more; $i++ } while($continue -eq $true)
$allresources = @(); $i=1;
do { $resources = Invoke-RestMethod "http://localhost:41184/notes/$($id)/resources?token=$token&fields=id,title,file_extension&page=$i"; $allresources += $resources.items; $continue = $resources.has_more; $i++ } while($continue -eq $true)
就喺我試緊嘅途中,我發現原來 Hugo page front matter 嘅 url 係跟 content root level - 例如我有一篇文擺喺 content/bananas/abc.md,入 url: "bello" 嘅話,條 link 會係 {BaseURL}/bello,而唔係 {BaseURL}/bananas/bello - 亦啫係代表可以好簡單咁解決咗 resources relative path 嘅問題,唔需要用到 API。
Change front matter
- 首先係 export
- 然後係改 front matter: created > date,source > url
- 再好似上面咁搬
$test = gc  -raw
$test = $test -split "---\n"
$test[1] = $test[1] -replace "source: ", "url: " -replace "created: ", "date: "
$test -join "---`n" | Out-File {targeted md}
成功!最後再執多少少格式嘢。
整色整水
Stickers
開一個新 file themes\PaperMod\assets\css\extended\custom.css
img[alt^="Sticker: "] {
    height: 85px;
    width: auto;
    display: inline-block;
    margin: 0;
}
喺 themes\PaperMod\layouts\partials\extend_footer.html 度加
<script>
    Array.from(document.querySelectorAll("a")).map(e => {
        if (e.querySelector("img[alt^='Sticker: ']") !== null) {
            e.style.boxShadow = "none";
            e.target = "_blank";
        }
    });
</script>
mermaid.js
喺 themes\PaperMod\layouts\partials\extend_head.html 度加
<!-- MermaidJS support -->
<script async src="https://cdn.jsdelivr.net/npm/mermaid/dist/mermaid.min.js"></script>
喺 themes\PaperMod\layouts\partials\extend_footer.html 度加
<script>
    // Replace mermaid pre.code to div
    Array.from(document.getElementsByClassName('language-mermaid')).forEach(el => {
        el.parentElement.outerHTML = `<div class="mermaid">${el.innerText}</div>`
    })
</script>
再起一個新 file layouts\shortcodes\mermaid.html
<div class="mermaid">
    {{.Inner}}
</div>
加埋落 custom.css
.mermaid svg {
    display: block;
    margin: auto;
}
GitLab Pages
Deployment Settings
最後最後,終於要擺上 GitLab,整返個 .gitlab-ci.yml,papermod-production 係我自訂嘅 config directory
image: registry.gitlab.com/pages/hugo/hugo_extended:latest

variables:
  GIT_SUBMODULE_STRATEGY: recursive

pages:
  script:
  - hugo --environment papermod-production
  artifacts:
    paths:
    - public
  rules:
  - if: $CI_COMMIT_BRANCH == $CI_DEFAULT_BRANCH
.gitignore
/public
Project Settings
GitLab Pages 可以做到就算係 private project,deploy 出嚟嘅網站都係 public。
去到 project settings 嘅 General > Visibility, project features, permissions,Project visibility 揀 private,Pages 揀 Everyone 就可以了。
最後擺埋上 GitLab,之後要 publish 新嘢就係 export > 改 front matter > upload to GitLab,非常簡單。
- 完 -